Introduction: For To-Do List in JavaScript
Create a To-Do List in JavaScript marks a pivotal step in your journey through coding and programming. This project not only aids in understanding JavaScript but also delves into DOM manipulation, event handling, and building user-friendly interfaces.
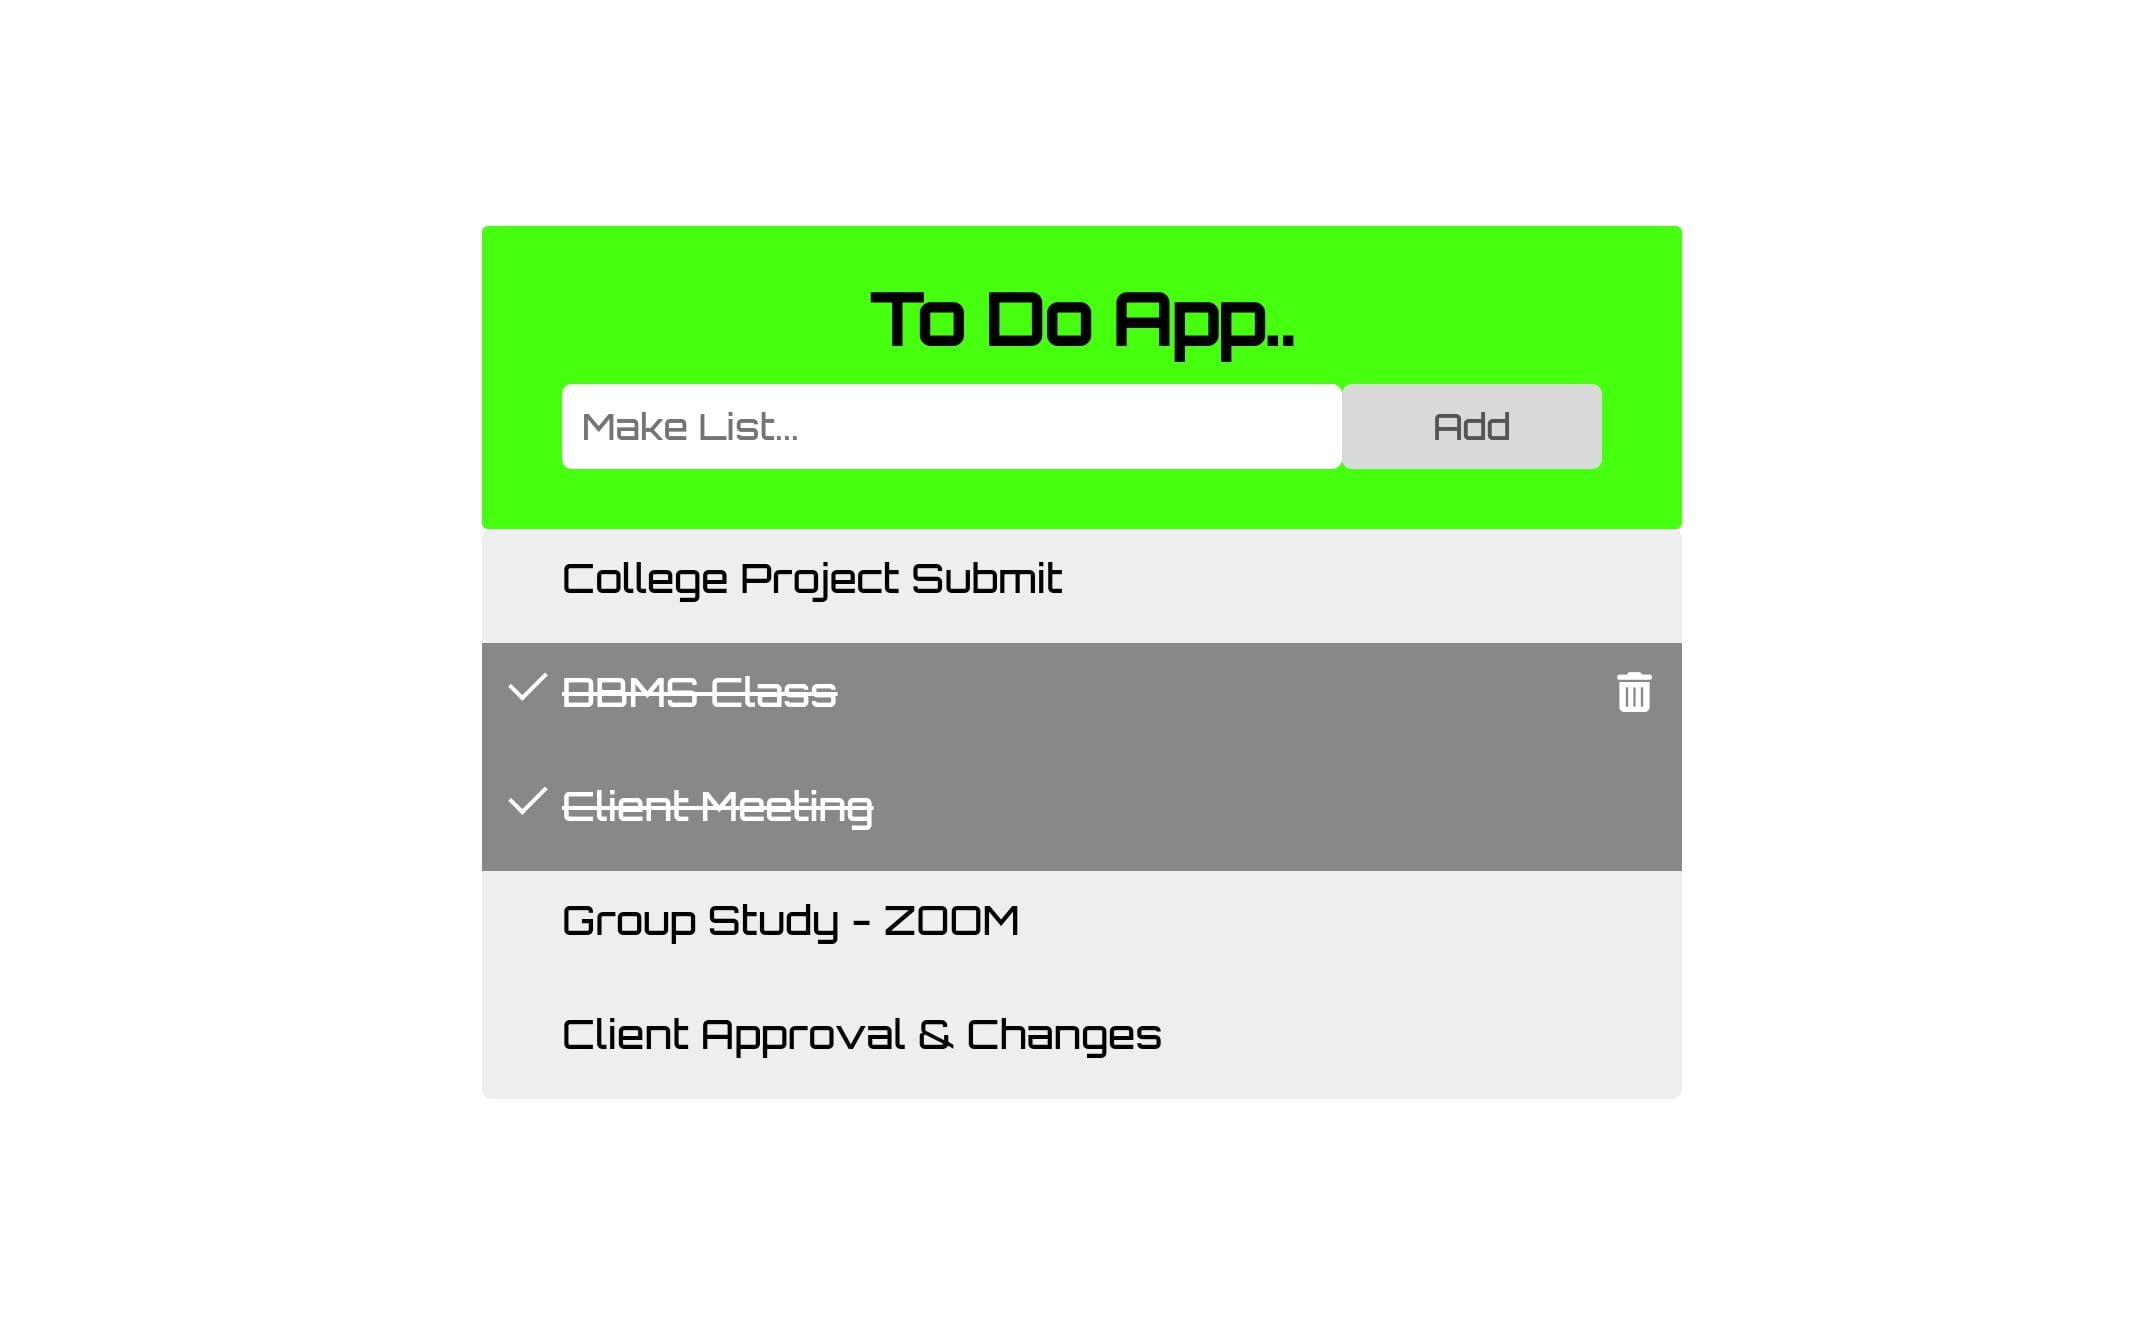
In this tutorial, we’ll walk you through creating a dynamic To-Do List application. With our provided code snippet, you’ll be able to construct your very own list where you can add tasks, mark them as complete, and remove them with ease.
Let’s embark on this journey of building a functional To-Do List in JavaScript, HTML, and CSS.
Steps to Create a To-Do List in JavaScript:
It’s begin by creating a folder and organizing your files. Within this folder, create three essential files: index.html, style.css, and script.js. These files will form the backbone of your To-Do List project.
Step 1: HTML Structure:
Open the index.html file and paste the provided HTML code. This code forms the skeleton of your To-Do List, comprising input fields for adding tasks and a container for displaying the tasks.
<!DOCTYPE html>
<html lang="en">
<head>
    <meta charset="UTF-8" />
    <meta name="viewport" content="width=device-width, initial-scale=1.0" />
    <title>todo list</title>
    <link rel="stylesheet" href="https://cdnjs.cloudflare.com/ajax/libs/font-awesome/6.4.2/css/all.min.css" />
</head>

<body>
    <div class="todo-container">
        <div class="todo-header">
            <h2>To Do App..</h2>
            <input type="text" placeholder="Make List..." autocomplete="off" autofocus />

            <div class="btn-container">
                <button>Add</button>
            </div>
        </div>

        <ul class="task-list"></ul>
    </div>
</body>
</html>
Step 2: Styling with CSS:
Proceed to the style.css file and insert the provided CSS code. This code snippet is responsible for enhancing the visual appeal of your To-Do List, ensuring an organized and user-friendly layout.
@import url('https://fonts.googleapis.com/css2?family=Lato:ital,wght@0,300;0,400;1,700&family=Orbitron:wght@500&family=Oswald&family=Signika&display=swap');

        * {
            margin: 0;
            padding: 0;
            box-sizing: border-box;
            font-family: 'Orbitron', sans-serif;

        }

        body {
            height: 100vh;
            display: flex;
            align-items: center;
            justify-content: center;
        }

        .todo-container {
            width: 600px;
            text-transform: capitalize;
        }

        /* style the container */
        .todo-container .todo-header {
            background-color: #46ff0e;
            padding: 15px 40px 30px;
            color: rgb(0, 0, 0);
            text-align: center;
            border-radius: 3px;

        }

        .todo-container .todo-header h2 {
            margin: 10px;
            font-size: 35px;
        }

        /* style the input tag */
        .todo-header input {
            width: 75%;
            border: none;
            outline: none;
            padding: 10px;
            font-size: 18px;
            border-radius: 5px;
            float: left;

        }

        /* style the button */
        .todo-header button {
            width: 25%;
            padding: 10px;
            float: left;
            color: #555;
            background-color: #d9d9d9;
            border: none;
            border-radius: 5px;
            font-size: 18px;
            cursor: pointer;
            transition: 0.3s;

        }

        .todo-header button:hover {
            background-color: #bbb;
        }

        .todo-container .todo-header::after {
            content: "";
            display: table;
            clear: both;
        }

        .task-list {
            max-height: 300px;
            overflow-y: auto;
        }

        ul {
            list-style-type: none;
            border-radius: 5px;
        }

        ul li {
            cursor: pointer;
            position: relative;
            background-color: #eee;
            padding: 12px 8px 20px 40px;
            font-size: 20px;
            user-select: none;
            transition: 0.3s;

        }

        ul li:hover {
            background-color: rgb(205, 204, 204);
        }

        ul li .close-btn {
            display: none;
            position: absolute;
            right: 15px;
        }

        ul li:hover .close-btn {
            display: inline-block;
        }

        ul li .close-btn i:hover {
            color: #ec1d1d;
        }

        ul li.done {
            background-color: #888;
            color: #fff;
            text-decoration: line-through;
        }

        ul li.done::before {
            content: "";
            width: 8px;
            height: 16px;
            position: absolute;
            top: 10px;
            left: 18px;
            border-width: 0px 2px 2px 0px;
            border-style: solid;
            border-color: white;
            transform: rotate(45deg);

        }

        @media only screen and (max-width: 600px) {
            .todo-container .todo-header {
                background-color: #1ec1f3;
            }

            .todo-header input {
                width: 100%;
            }

            .btn-container button {
                width: 50%;
                margin-left: 25%;
                margin-top: 5%;
                text-align: center;
            }

            .todo-container .todo-header h2 {
                text-align: center;
            }
        }
Step 3: JavaScript Functionality:
In the script.js file, incorporate the provided JavaScript code. This code grants functionality to your To-Do List. It allows users to add tasks, mark them as done, and remove completed tasks from the list.
        let addBtn = document.querySelector("button");
        let taskList = document.querySelector(".task-list");
        let input = document.querySelector("input");

        addBtn.addEventListener("click", () => {
            let text = input.value;
            let task = createTask(text);
            if (input.value.length > 0) {
                task.innerHTML +=
                    '<span class="close-btn"><i class="fa-solid fa-trash-can"></i></span>';
                taskList.appendChild(task);
                input.value = "";
            }
        });

        taskList.addEventListener("click", (e) => {
            if (e.target.nodeName === "I") {
                e.target.parentElement.parentElement.style = "display:none";
            }
            if (e.target.nodeName === "LI") {
                e.target.classList.toggle("done");
            }
        });

        function createTask(text) {
            let li = document.createElement("li");
            li.textContent = text;
            return li;
        }
Conclusion:
Through this tutorial, you’ve constructed a fully operational To-Do List in JavaScript. Embrace this opportunity to customize the application further, adding features that align with your project goals.
Start your coding journey by implementing this To-Do List application. It’s not just about building lists; it’s about learning and expanding your coding horizons. Happy coding!
Remember, the real learning begins when you start experimenting with the code and make it your own. The To-Do List you create today could be the foundation for more complex projects tomorrow.
For your benefit, the total source code of this instructional exercise is accessible for download by clicking the Download Code button. Moreover, experience a live exhibit of these Custom Animated Button in JavaScript by getting to the View Live button.
Note: Keep in mind that the way to dominate coding is practice. To enhance your skills in JavaScript, HTML & CSS, we recommend recreating other useful website elements such as Custom Button, Reviews Card, Contact Page, Navigation, Login Forms, etc.
More Categories:
Blog • Cards • Fun Project • Game • Hamburger Menu • Login / Signup • Navbar • Testimony / Reviews • To-Do List